- Petra Scan investigates the last 6 months of activity to uncover active attackers and leftover persistence. You receive a white-labeled Scan Report PDF, sharable with the client, within 24 to 48 hours. See Petra Scan for the full breakdown.
- Active Monitoring begins immediately. Petra monitors the tenant 24/7. The first 14 days are included for new tenants.
Recommended trial approach
- Connect Partner Center. This lets you onboard every tenant in your Partner Center at once instead of adding them one at a time. See Via Partner Center below.
- Scan all tenants. Every connected tenant gets a Scan and starts monitoring automatically. The more tenants you scan, the more likely Petra is to surface active attackers or leftover persistence that other tools missed.
- Check back in 24 hours. You will see reports of any compromises found, including the attacker’s activity, a timeline, and the Petra team’s recommendations for remediation.
Onboarding methods
When you click Add Tenant from the navbar, Petra gives you two options.Partner Center
Connect your CSP account and onboard tenants in bulk through your existing GDAP relationships. No client action required.
Add Individually
Add a single tenant by signing in as (or sending a link to) the tenant’s Global Admin.
Via Partner Center
Partner Center integration connects Petra to your CSP account so you can discover, onboard, and manage all of your GDAP-managed tenants from a single page.- Click Add Tenant and choose Continue with Partner Center (or go directly to app.petrasecurity.com/portal).
- If this is your first time, click Connect Microsoft Partner Center and sign in with your MSP tenant credentials.
- After connecting, your managed tenants appear in a table. Click Onboard next to the tenant you want to add.
- Configure the Add Tenant modal and click Onboard Tenant.
Add Individually
Use this method when you do not have a Partner Center account, or when you need to add a single tenant outside of a GDAP relationship.Step 1: Sign in to Petra
Go to app.petrasecurity.com and sign in.Step 2: Click Add Tenant
Click Add Tenant from the navbar and choose Add tenants individually.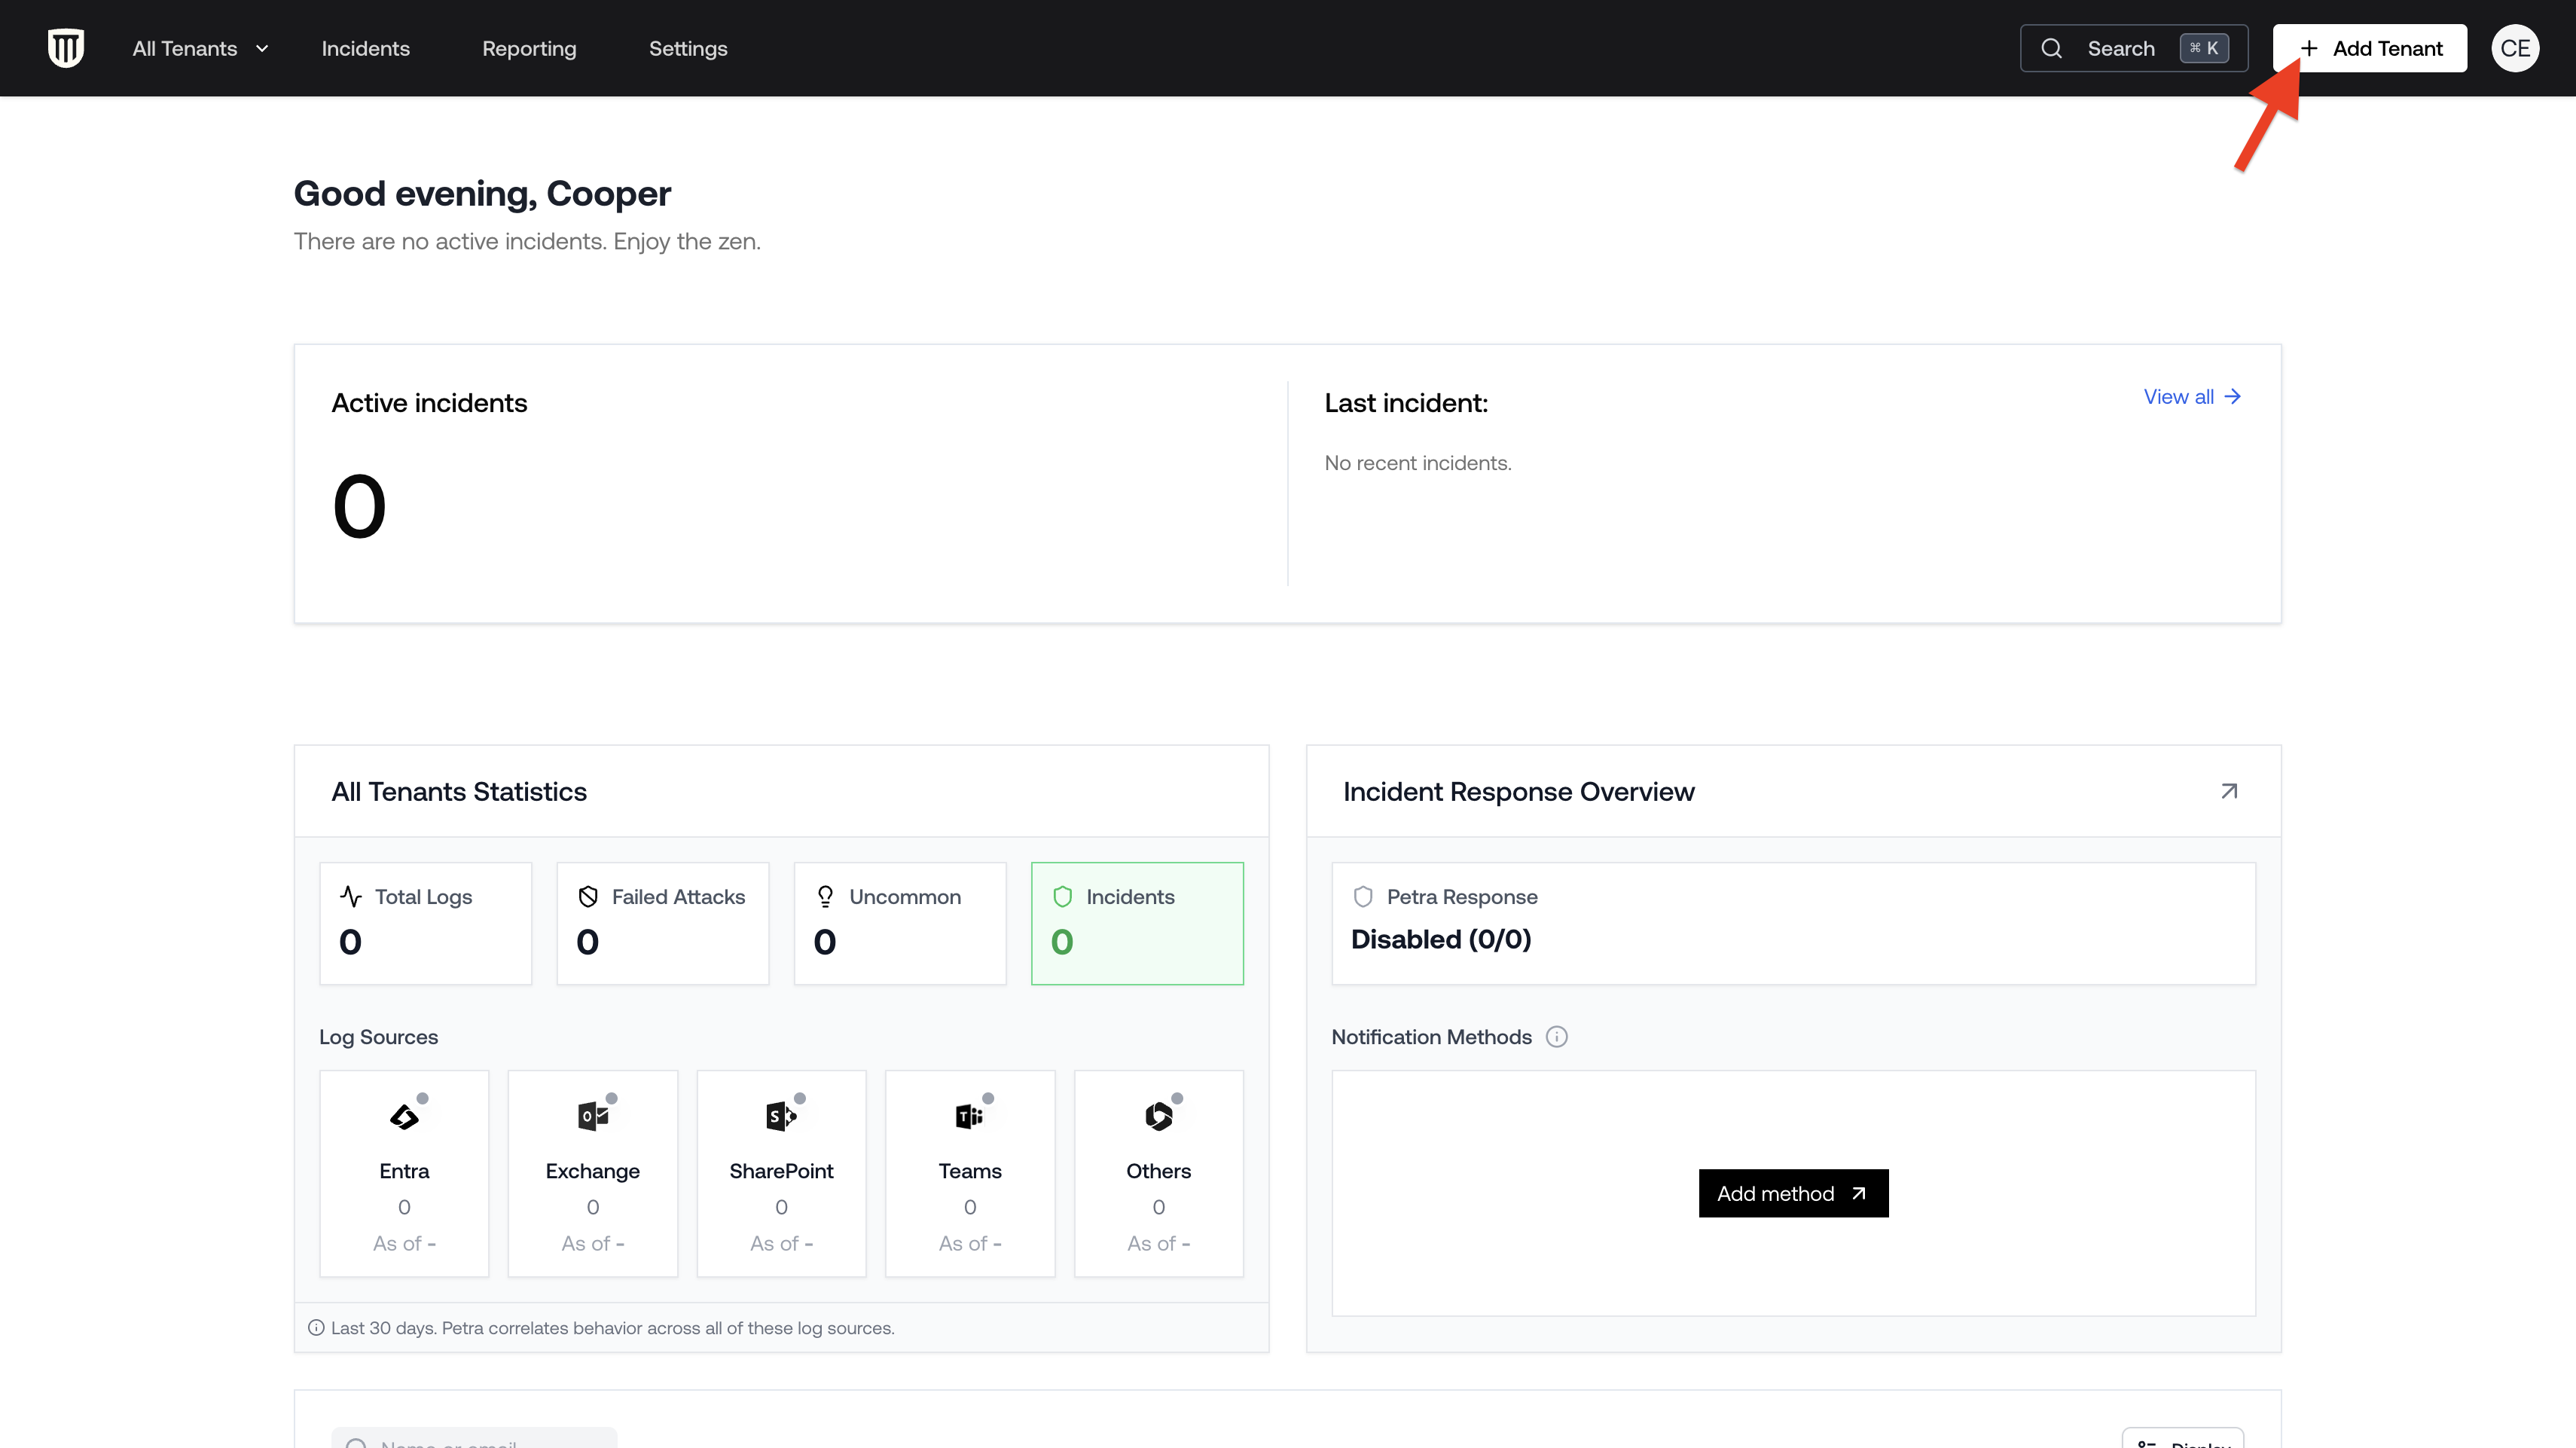
Step 3: Configure the onboarding
The Add Tenant modal opens. Review the defaults, adjust if needed (Petra Response, Scan-only), and check the onboarding summary.Step 4: Add the Azure app
Click Onboard to proceed. You can either approve the app yourself (if you are a Global Admin on the tenant) or send the approval link to the tenant’s Global Admin.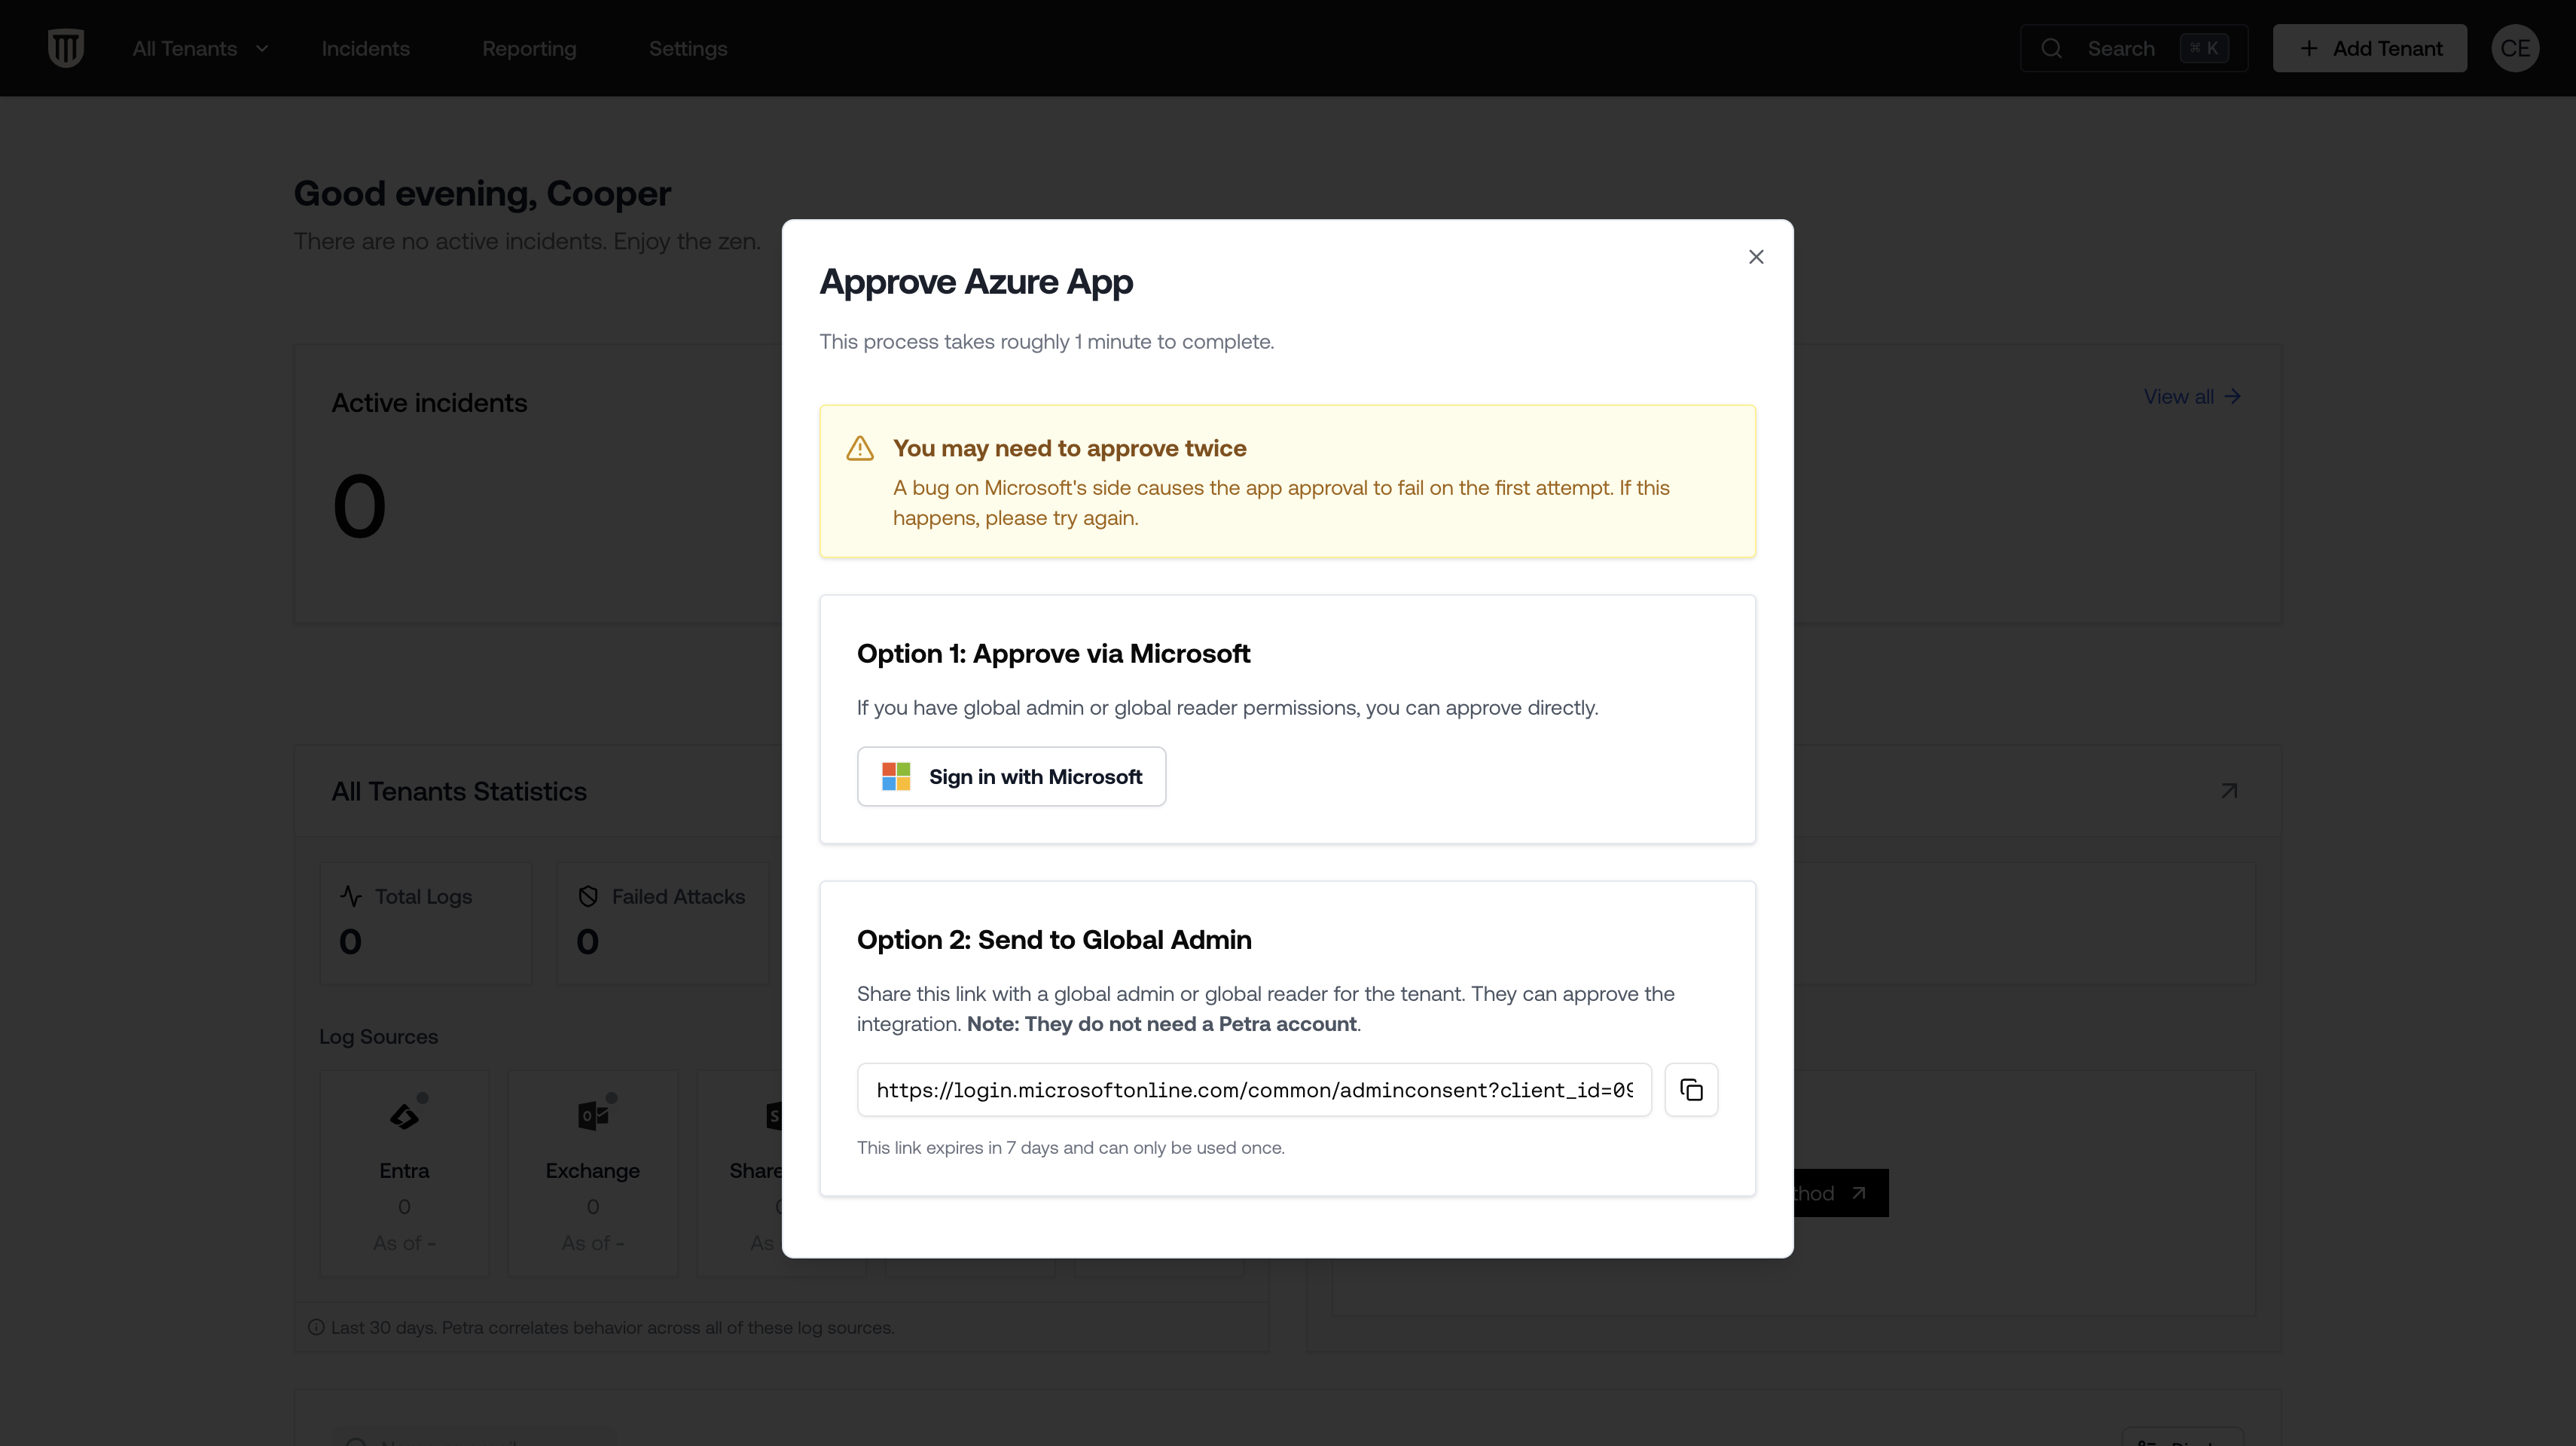
What Petra Scan covers
Scan is included with every onboarded tenant and runs automatically.- Analyzes the last 6 months of activity across Entra, Exchange, SharePoint, Teams, Apps, and more.
- Surfaces active attackers still in the environment and persistence mechanisms like malicious inbox rules and app consents.
- Highlights previously remediated compromises that our SOC team believes warrant attention.
- Identifies frequently targeted accounts based on observed failed-attack patterns, so you can advise those users to harden.
- Produces a white-labeled Scan Report PDF (your logo, name, and contact email) that you can share with clients or use in sales meetings. Update branding in Settings > Branding.
Petra Scan can only analyze logs that Microsoft was actively recording. If audit logs were recently enabled, the lookback only covers the period since they were turned on. See Audit Logs for details.
What Active Monitoring does
Every onboarded tenant gets 14 days of active monitoring that begins after the Scan completes. During that window, the tenant is monitored exactly like a paying tenant.- Monitors activity in real time across Entra, Exchange, SharePoint, Teams, app registrations, and more.
- Detects compromises as they happen using behavioral analysis.
- Stops attacks automatically if Petra Response is enabled (locks compromised accounts, revokes sessions, removes inbox rules).
- Delivers full incident detail (signals, remediation steps, forensic timeline) for any compromise caught during the trial window.
Scan-only option
Scan-only lets you run a 6-month lookback for active attackers and get 14 days of monitoring, without the risk of being billed for usage before the client decides to sign up.- Scan: 6-month lookback to uncover active attackers and leftover persistence (inbox rules, apps, etc.).
- 14 days of monitoring: during this window, Petra monitors the tenant just like any other. If a compromise happens, you get the full incident with signals, remediation steps, and forensic detail.
- Auto-pause after 14 days: the tenant pauses automatically. Billing stops. No action needed. Resume any time from Settings > Usage.
Scan-only is a great way to enroll prospects: run the Scan, surface real findings, then decide which tenants to keep on monitoring after the 14 days.
Scan vs. Autopsy
- Scan surfaces active attackers and leftover persistence. It is not guaranteed to pull every previously remediated compromise.
- Autopsy pulls every previously remediated compromise with full forensic detail. It is a paid service for IR firms and deep investigations where everything is remediated but you still want to know everything that happened.
Autopsy Mode
Autopsy Mode is for incident response firms and special cases. Most users do not need it.
When Autopsy makes sense
- Incident response: A client has been compromised and you need a complete forensic record of everything that happened.
- Prospecting: You want to demonstrate the full scope of security gaps to a prospect with a detailed report.
What you get
- A “Petra Autopsy Complete” email summarizing findings.
- A white-labeled Prospecting Report PDF with full forensics, incident details, blast radius analysis, and a “What Should Have Happened” timeline. See Prospecting Report for details.
- Per-incident Threat Remediation Reports for each discovered incident.
- Access to all findings in the Petra dashboard.