> ## Documentation Index
> Fetch the complete documentation index at: https://docs.petrasecurity.com/docs/llms.txt
> Use this file to discover all available pages before exploring further.
# Custom Webhooks
> Connect any automation tool to Petra and trigger workflows the moment an incident is detected.
Custom Webhooks let you send Petra incident alerts to any external service the moment a compromise is detected. Whether you use Zapier, Make (formerly Integromat), n8n, Power Automate, a SIEM, or your own internal tooling, you can connect it to Petra without writing any custom integration code.
 ## How it works
When Petra detects a compromise, it fires an HTTP request to every webhook you have configured for your organization. You control the URL, HTTP method, headers, and the JSON payload — including which incident variables get interpolated into the body.
This happens automatically on the initial incident notification, in parallel with any other notification methods you have set up (email, SMS, Slack, PSA ticketing, etc.).
## Setting up a webhook
1. Navigate to **Settings** in Petra: [https://app.petrasecurity.com/settings](https://app.petrasecurity.com/settings)
2. Scroll to the **Custom Webhooks** section
3. Click **Add Webhook**
4. Fill in the configuration fields (see below) and click **Save**
You can add as many webhooks as you need. Each one fires independently on every incident.
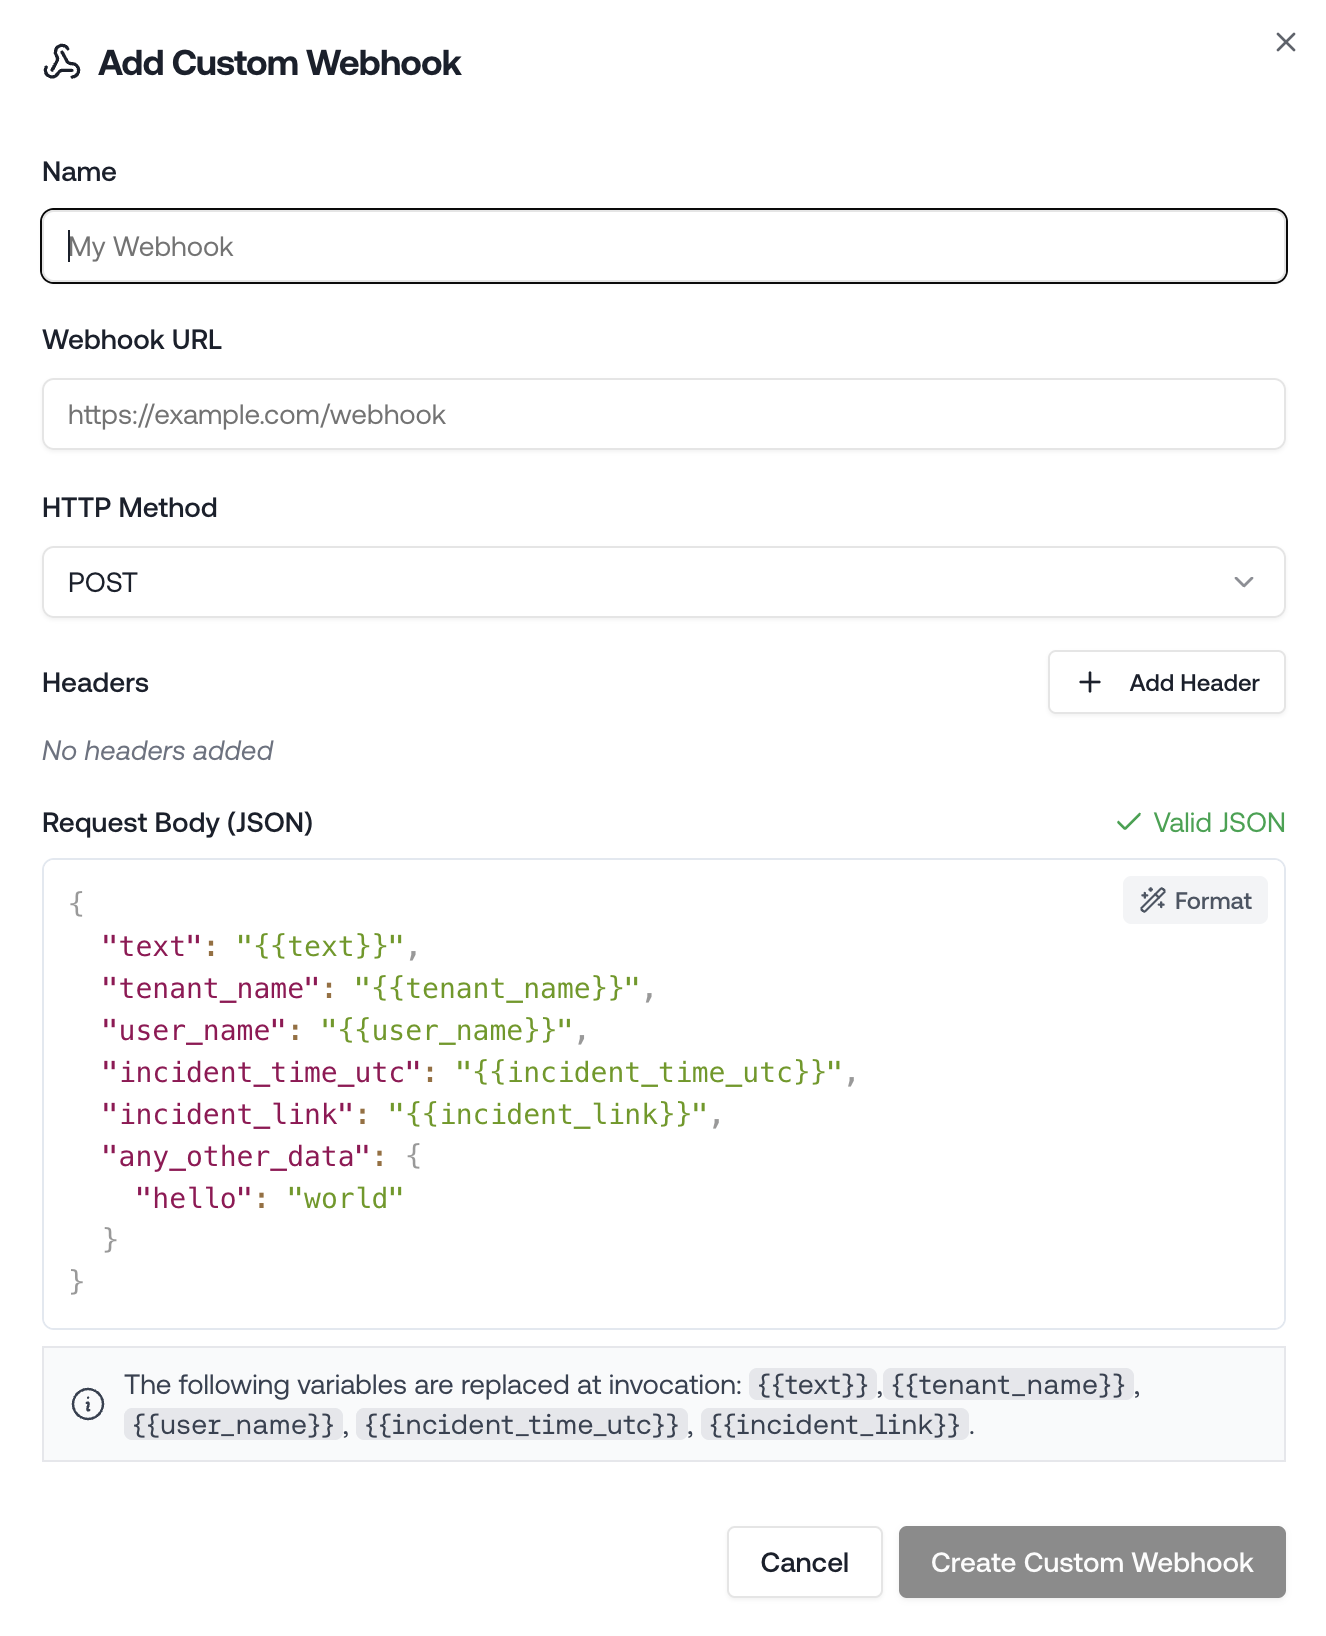
## Configuration
### Name
A label to identify this webhook inside Petra. Not sent in the request.
### URL
The endpoint Petra will send the request to. Must be a valid **HTTPS** URL.
### HTTP Method
Choose the method that your destination expects:
| Method | When to use |
| -------- | ------------------------------------------------------------------------- |
| `POST` | Default. Use for most webhook receivers (Zapier, Make, n8n, custom APIs). |
| `PUT` | Use when the destination expects a full resource update. |
| `PATCH` | Use when the destination expects a partial update. |
| `GET` | Use for simple notification endpoints that don't accept a body. |
| `DELETE` | Rarely used; included for completeness. |
### Headers
Add any custom HTTP headers your destination requires, such as an authorization token or a content-type override.
If you include a body and don't set a `Content-Type` header, Petra automatically adds `Content-Type: application/json`.
Header key rules:
* Keys cannot contain spaces
* Keys must be unique (case-insensitive)
### Body (JSON)
For non-GET requests, you can provide a JSON payload. Use `{{variable}}` placeholders and Petra will replace them with real incident data before sending.
**Available variables:**
| Variable | Description |
| ----------------------- | ------------------------------------------------------------------------------- |
| `{{text}}` | A human-readable summary of the incident (e.g. "Compromised Identity Detected") |
| `{{tenant_name}}` | The display name of the affected Microsoft 365 tenant |
| `{{user_name}}` | The display name, email, or UPN of the affected identity |
| `{{incident_time_utc}}` | The time the incident was created, in ISO 8601 UTC format |
| `{{incident_link}}` | A direct URL to the incident in the Petra portal |
**Default payload template:**
```json theme={null}
{
"text": "{{text}}",
"tenant_name": "{{tenant_name}}",
"user_name": "{{user_name}}",
"incident_time_utc": "{{incident_time_utc}}",
"incident_link": "{{incident_link}}"
}
```
You can add, remove, or rearrange fields freely. Any static values (strings, numbers, nested objects) are passed through as-is; only `{{variable}}` placeholders are replaced.
## Testing
To verify your webhook is configured correctly:
1. Navigate to **Settings** → **Notification Methods**
2. Click **Test Notification Methods** at the bottom of the page
Petra will fire a test request to all configured webhooks using sample incident data. Check your destination service to confirm the payload arrived and the variables were substituted correctly.
## Managing webhooks
You can **edit** or **delete** any webhook from the Custom Webhooks section in Settings. Deleting a webhook stops it from receiving future notifications immediately.
## Troubleshooting
**No request arriving at my endpoint**
* Confirm the URL is HTTPS and publicly reachable
* Check that the webhook is saved and appears in the list (not deleted)
* Run a test notification and check your endpoint's request logs
**Variables not being replaced**
* Variable names are case-sensitive. Use lowercase with underscores exactly as shown: `{{tenant_name}}`, not `{{Tenant_Name}}`
* Make sure the value is inside a quoted string in your JSON body
**JSON validation error when saving**
* The body must be valid JSON. Use the format shortcut (⌘S / Ctrl+S) to auto-format and surface syntax errors
* GET requests do not require or accept a body
**Header key rejected**
* Header keys cannot contain spaces or be duplicated. Use hyphens instead of spaces (e.g., `X-Api-Key` not `X Api Key`)
Need help? Email us at [support@petrasecurity.com](mailto:support@petrasecurity.com).
## How it works
When Petra detects a compromise, it fires an HTTP request to every webhook you have configured for your organization. You control the URL, HTTP method, headers, and the JSON payload — including which incident variables get interpolated into the body.
This happens automatically on the initial incident notification, in parallel with any other notification methods you have set up (email, SMS, Slack, PSA ticketing, etc.).
## Setting up a webhook
1. Navigate to **Settings** in Petra: [https://app.petrasecurity.com/settings](https://app.petrasecurity.com/settings)
2. Scroll to the **Custom Webhooks** section
3. Click **Add Webhook**
4. Fill in the configuration fields (see below) and click **Save**
You can add as many webhooks as you need. Each one fires independently on every incident.
## Configuration
### Name
A label to identify this webhook inside Petra. Not sent in the request.
### URL
The endpoint Petra will send the request to. Must be a valid **HTTPS** URL.
### HTTP Method
Choose the method that your destination expects:
| Method | When to use |
| -------- | ------------------------------------------------------------------------- |
| `POST` | Default. Use for most webhook receivers (Zapier, Make, n8n, custom APIs). |
| `PUT` | Use when the destination expects a full resource update. |
| `PATCH` | Use when the destination expects a partial update. |
| `GET` | Use for simple notification endpoints that don't accept a body. |
| `DELETE` | Rarely used; included for completeness. |
### Headers
Add any custom HTTP headers your destination requires, such as an authorization token or a content-type override.
If you include a body and don't set a `Content-Type` header, Petra automatically adds `Content-Type: application/json`.
Header key rules:
* Keys cannot contain spaces
* Keys must be unique (case-insensitive)
### Body (JSON)
For non-GET requests, you can provide a JSON payload. Use `{{variable}}` placeholders and Petra will replace them with real incident data before sending.
**Available variables:**
| Variable | Description |
| ----------------------- | ------------------------------------------------------------------------------- |
| `{{text}}` | A human-readable summary of the incident (e.g. "Compromised Identity Detected") |
| `{{tenant_name}}` | The display name of the affected Microsoft 365 tenant |
| `{{user_name}}` | The display name, email, or UPN of the affected identity |
| `{{incident_time_utc}}` | The time the incident was created, in ISO 8601 UTC format |
| `{{incident_link}}` | A direct URL to the incident in the Petra portal |
**Default payload template:**
```json theme={null}
{
"text": "{{text}}",
"tenant_name": "{{tenant_name}}",
"user_name": "{{user_name}}",
"incident_time_utc": "{{incident_time_utc}}",
"incident_link": "{{incident_link}}"
}
```
You can add, remove, or rearrange fields freely. Any static values (strings, numbers, nested objects) are passed through as-is; only `{{variable}}` placeholders are replaced.
## Testing
To verify your webhook is configured correctly:
1. Navigate to **Settings** → **Notification Methods**
2. Click **Test Notification Methods** at the bottom of the page
Petra will fire a test request to all configured webhooks using sample incident data. Check your destination service to confirm the payload arrived and the variables were substituted correctly.
## Managing webhooks
You can **edit** or **delete** any webhook from the Custom Webhooks section in Settings. Deleting a webhook stops it from receiving future notifications immediately.
## Troubleshooting
**No request arriving at my endpoint**
* Confirm the URL is HTTPS and publicly reachable
* Check that the webhook is saved and appears in the list (not deleted)
* Run a test notification and check your endpoint's request logs
**Variables not being replaced**
* Variable names are case-sensitive. Use lowercase with underscores exactly as shown: `{{tenant_name}}`, not `{{Tenant_Name}}`
* Make sure the value is inside a quoted string in your JSON body
**JSON validation error when saving**
* The body must be valid JSON. Use the format shortcut (⌘S / Ctrl+S) to auto-format and surface syntax errors
* GET requests do not require or accept a body
**Header key rejected**
* Header keys cannot contain spaces or be duplicated. Use hyphens instead of spaces (e.g., `X-Api-Key` not `X Api Key`)
Need help? Email us at [support@petrasecurity.com](mailto:support@petrasecurity.com).